
Using GitHub to compile your documentation
In the previous lesson we learned how to use GitHub actions to build and test our python module. In this lesson we’ll learn how to compile our documentation with another GitHub action.
Creating a new workflow
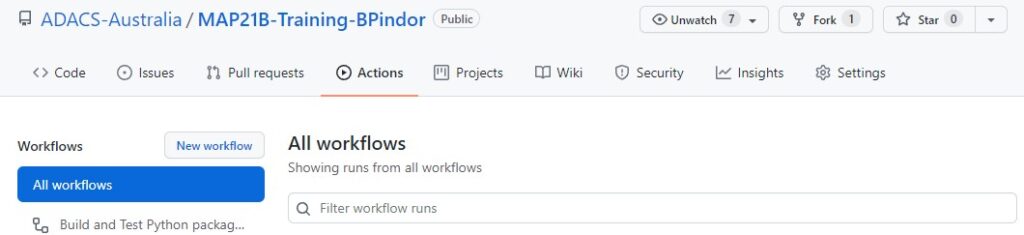
To create a new action the easiest way is to use the Actions tab of your GitHub repo, and select the New Workflow button.
The New workflow button will take you to a page to choose a template from a long list. Last time we started with a pre-made template for building and testing python code. This time we are going to start with a generic template so we should click on the “set up a workflow yourself ->” link.
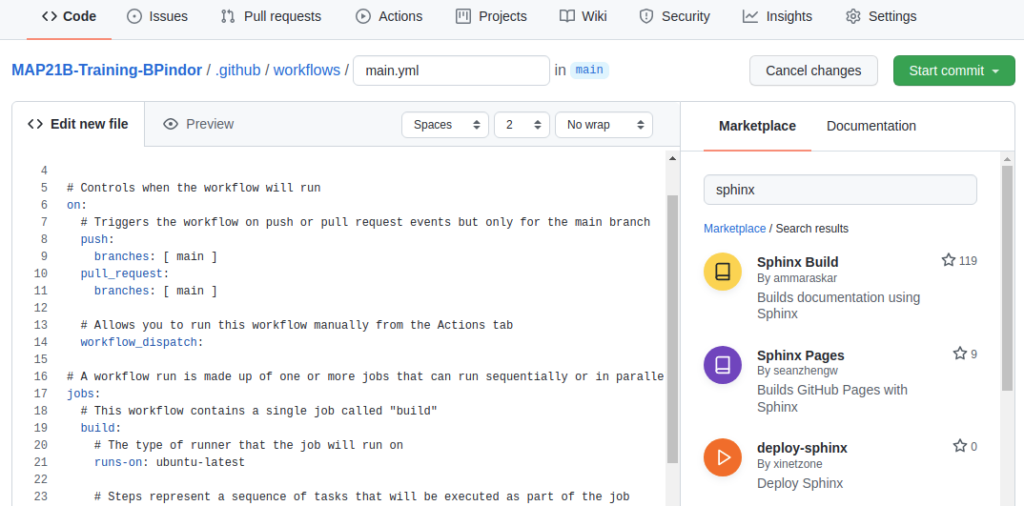
We should see the following template appear under the file name of .github/workflows/main.yml:
# This is a basic workflow to help you get started with Actions

name: CI

# Controls when the workflow will run
on:
  # Triggers the workflow on push or pull request events but only for the main branch
  push:
    branches: [ main ]
  pull_request:
    branches: [ main ]

  # Allows you to run this workflow manually from the Actions tab
  workflow_dispatch:

# A workflow run is made up of one or more jobs that can run sequentially or in parallel
jobs:
  # This workflow contains a single job called "build"
  build:
    # The type of runner that the job will run on
    runs-on: ubuntu-latest

    # Steps represent a sequence of tasks that will be executed as part of the job
    steps:
      # Checks-out your repository under $GITHUB_WORKSPACE, so your job can access it
      - uses: actions/checkout@v2

      # Runs a single command using the runners shell
      - name: Run a one-line script
        run: echo Hello, world!

      # Runs a set of commands using the runners shell
      - name: Run a multi-line script
        run: |
          echo Add other actions to build,
          echo test, and deploy your project.
First up we should change the filename to something other than main.py and the name field to something other than CI. The section that controls when the workflow is run is maybe a little over-zealous but we can leave it for now. Finally, the first step which uses actions/checkout@v2 is always useful as it will check out our repository into the build environment. The named steps after this are not currently useful so we should delete them. We’ll replace these with a new step which does the documentation build for us.
Using a template from the market place
Since we want to build our documentation using Sphinx, we can find a ready made solution in the GitHub marketplace. On the right panel we select the marketplace and search for Sphinx. The first result “Sphinx Build” looks like it does what we want so we’ll select that.
When we click the “Sphinx Build” result we get the following snippet of code. Which we can include in our workflow file.
- name: Sphinx Build
  # You may pin to the exact commit or the version.
  # uses: ammaraskar/sphinx-action@8b4f60114d7fd1faeba1a712269168508d4750d2
  uses: ammaraskar/sphinx-action@0.4
  with:
    # The folder containing your sphinx docs.
    docs-folder: # default is docs/
    # The command used to build your documentation.
    build-command: # optional, default is make html
    # Run before the build command, you can use this to install system level dependencies, for example with "apt-get update -y && apt-get install -y perl"
    pre-build-command: # optional
To use the above template we make a new step called “Sphinx Build” and copy the template into that step. As we do this we need to fill in values for docs-folder and build-command. The pre-build-command is optional and we wont use it so we can either delete it or comment it out. Our step section now looks like this:
    # Steps represent a sequence of tasks that will be executed as part of the job
    steps:
      # Checks-out your repository under $GITHUB_WORKSPACE, so your job can access it
      - uses: actions/checkout@v2

      - name: Sphinx Build
        # You may pin to the exact commit or the version.
        uses: ammaraskar/sphinx-action@0.4
        with:
          # The folder containing your sphinx docs.
          docs-folder: docs/
          # The command used to build your documentation.
          build-command: make html
If we commit this file it will trigger all our on:push workflows to trigger – both the build/test workflow that we created earlier, and this documentation workflow. For my example I used the name “Documentation with Sphinx” for the workflow, and when it completes I see the following output.
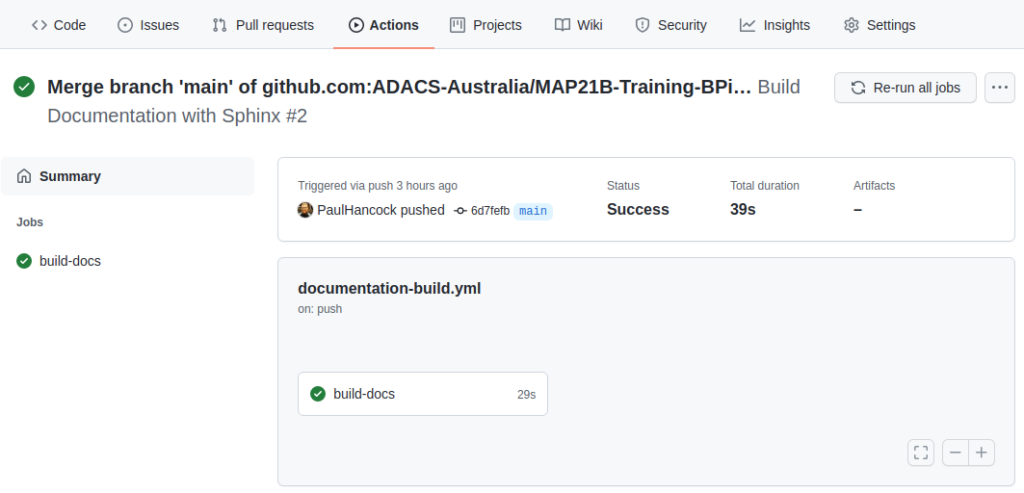
The good news is that the documentation built without error. The bad news is that I can’t see the documentation to ensure that it’s actually useful. Note in the above image that there are three notes following our job: Status, Total duration, and Artifacts. Artifacts are files that are retained after a job completes. By default there are no artifacts, but we could modify our workflow so that the documentation is part of the artifacts.
Saving the documentation
To save the documentation that was built we need to let the GitHub workflow know that the documentation should be considered an artefact of the build. The advanced guide for GitHub actions demonstrates how to do this using another pre-made recipe which is as follows:
  - name: 'Upload Artifact'
    uses: actions/upload-artifact@v2
    with:
      name: my-artifact
      path: my_file.txt
For us we want the artifact to be a directory docs/build/ and we’ll give it a name of documentation-html.
Our full workflow for this lesson now looks like this:
# This is a basic workflow to help you get started with Actions

name: Build Documentation with Sphinx

# Controls when the workflow will run
on:
  # Triggers the workflow on push or pull request events but only for the main branch
  push:
    branches: [ main ]
  pull_request:
    branches: [ main ]

  # Allows you to run this workflow manually from the Actions tab
  workflow_dispatch:

# A workflow run is made up of one or more jobs that can run sequentially or in parallel
jobs:
  # This workflow contains a single job called "build"
  build-docs:
    # The type of runner that the job will run on
    runs-on: ubuntu-latest

    # Steps represent a sequence of tasks that will be executed as part of the job
    steps:
      # Checks-out your repository under $GITHUB_WORKSPACE, so your job can access it
      - uses: actions/checkout@v2

      - name: Sphinx Build
        # You may pin to the exact commit or the version.
        uses: ammaraskar/sphinx-action@0.4
        with:
          # The folder containing your sphinx docs.
          docs-folder: docs/
          # The command used to build your documentation.
          build-command: make html

      - name: Archive documentation
        uses: actions/upload-artifact@v2
        with:
          name: documentation-html
          path: docs/build/
If we save and wait for the triggered workflow to complete we should see that the artifacts field is now 1, and that there is a new section on our page which shows all the artifacts that were produced.

We can click on the documentation-html link to get a zip of the docs/build/ directory which contains all our documentation.
Summary
Building documentation requires a similar workflow to building and testing code.
The GitHub marketplace offers a variety of pre-made ‘steps’ to include in your workflow. There are many that will let you build documentation with Sphinx.
When building documentation we need to ensure that the documentation that was built is considered part of the workflow ‘artifact’ so that we can download and view it after the workflow completes.