
Hosting your code on pypi.org
The python package index at pypi.org is the first place that pip will look when asked to install a package. If your package is avaialble via pypi.org then your users can install your software simply by typing pip install <package>. Installing from other locations is still possible and sometimes easy. In this lesson we’ll go through the process of preparing your code and uploading it to pypi.org. This content is based on the instructions at Packaging Python Projects (PyPA), which you should also refer to.
Name check
Unlike GitHub where the project name is disambiguated based on the project owner, pypi requires that each package have it’s own unique name. So before you think about uploading your package to pypi.org you should do a search to see if your package name is already in use, and choose a new one if this is the case.
Once you have a name you like you should google it. This is what many people will do when looking for your code and if the results that come back are for a different software project (e.g. same name different language), or are NSFW then people will be less likely to keep looking.
You can choose nearly anything you like as the package name, however PEP423 has some advice about how you might choose and structure your package name.
Project structure
If you use the structure outline in Beginning a new software project, and have created a setup.py file as described in Installing your module via setup.py, then you are good to go. The project structure recommended in these lessons differs from that which is given on the PyPA site but will still work.
Project metadata
In addition to the meta data that we have already included in the setup.py file we can include information that has special meaning on the pypi site. This information is used to populate many of the links on the landing page for a package. An example for the numpy package is shown below:
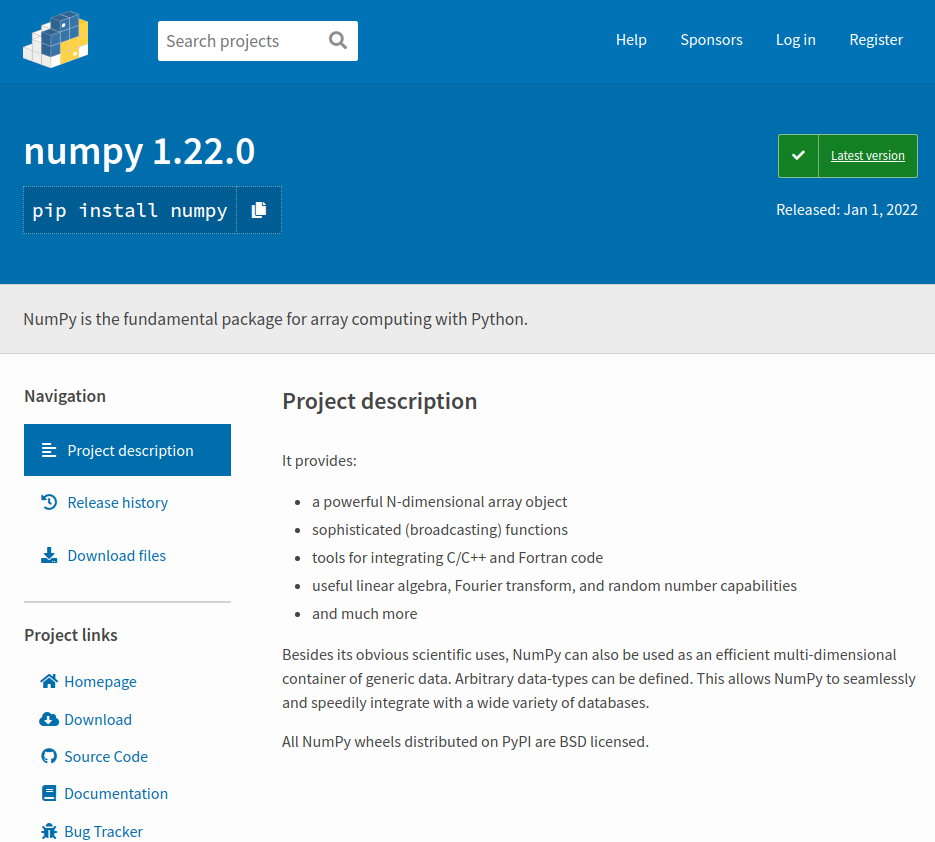
The information in the project description is rendered from the long_description metadata using the long_description_content_type to inform how the rendering should be done. Many projects choose to copy their README.md file into this field (as we did in a previous lesson), however you can of course create a custom description for a pypi audience.
The information in the project links section is drawn from the project_urls dictionary. You can have any description/links you like here. Some of the obvious ones get appropriate icons but these cannot be customised.
Another sectionson the pypi landing page that you may want to populate is “Classifiers”. For numpy they are shown below.
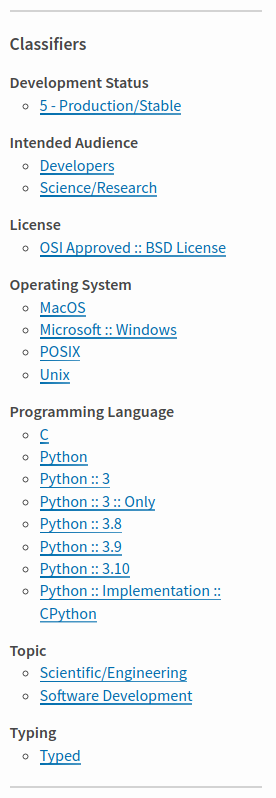
The classifiers section helps people see additional metadata in a regular format, and also allows people to search for other projects with similar classifiers. Classifiers are specified as a list of strings in the classifiers parameter within setup.py. These classifiers can be changed for each release of a project. A list of classifiers can be found at pypi.org/classifiers/. It is a long list, so maybe the first point of call would be to look at a package like numpy or astropy that you think would have similar classifiers and copy the relevant ones into your package.
Building a distribution package
PyPA provides a package simply called build that will create a package from your project. Install it using python3 -m pip install --upgrade build, and then run it using python3 -m build. It will create a directory called dist/ which contains a .tar.gz file (your source archive) and a .whl file which is the build distribution. Congratulations, you now have a package that can be served by pypi – you just need a way to upload it.
Uploading to pypi
The first thing that you need is to create an account on pypi.org. Accounts are free and easy to make so go sign up here.
The second thing you’ll need is an API token. As noted on PyPA:
To securely upload your project, you’ll need a PyPI API token. Create one at https://test.pypi.org/manage/account/#api-tokens, setting the “Scope” to “Entire account”. Don’t close the page until you have copied and saved the token — you won’t see that token again.
https://packaging.python.org/en/latest/tutorials/packaging-projects/
Uploading to pypi is handled by the twine module which can be installed using python3 -m pip install --upgrade twine.
To upload your package use:
python3 -m twine upload dist/*
When prompted for a username you should use __token__ and for your password you should use pypi-<API_Token_Value>.
If you want to test that your upload will work and see what the page would look like without placing it on the main package index you can use the test repository. To do this just add --repository testpypi after twine in the above command. When you upload to the test repository you can see the results at https://test.pypi.org/project/example-pkg-YOUR-USERNAME-HERE. This test site is good to use for the first time you are uploading as you’ll invariably want to make some small changes once you’ve seen how the landing page renders.
Congratulations, you now have a package published in the python package index. For more details and some alternatives to the method given above you are referred to the PyPA tutorial.